
A Step-by-Step Guide to Using the xpertSea MAX Harvest Planner
Welcome to the xpertSea MAX Harvest Planner guide!
This guide will empower your shrimp farm management and help you plan out your harvests more efficiently, by understanding the biomass to be harvested in each commercial class for all of your ponds at any date in the next 5 weeks. Let's dive in and unlock the xpertSea MAX Harvest Planner!
1. Getting Started
After logging in, access the Harvest Planner through the left side navigation menu under the “Planning” section. In order to use this functionality, you need to have completed monitorings on your pond, and have input the survival rate for a pond. You can enter the survival rate on this page if you have not already done so.
Need help with monitoring? Check out our blog post here.
2. Overview
In the harvest planner, there are 4 main sections:
View: Select the variable you would like to see between average weight, biomass, biomass per hectare, or % of biomass.
Target size: Select the target commercial size you want to see, and watch the calendar change as you change the size.
Calendar: See weight and biomass projections for the next 5 weeks, and if you select a target size, you will see the cell highlighted for the week where the maximum percentage of biomass in the pond will be in that class. Add your planned partial and full harvests for the ponds that meet your requirements.
Harvest plan summary: See a summary of all your harvests between your selected dates. Understand what the estimated biomass is in each commercial class and all of your ponds that are planned to be harvested.

Example of a harvest plan, with the numbers identifying the four components above
3. Adding Planned Harvests
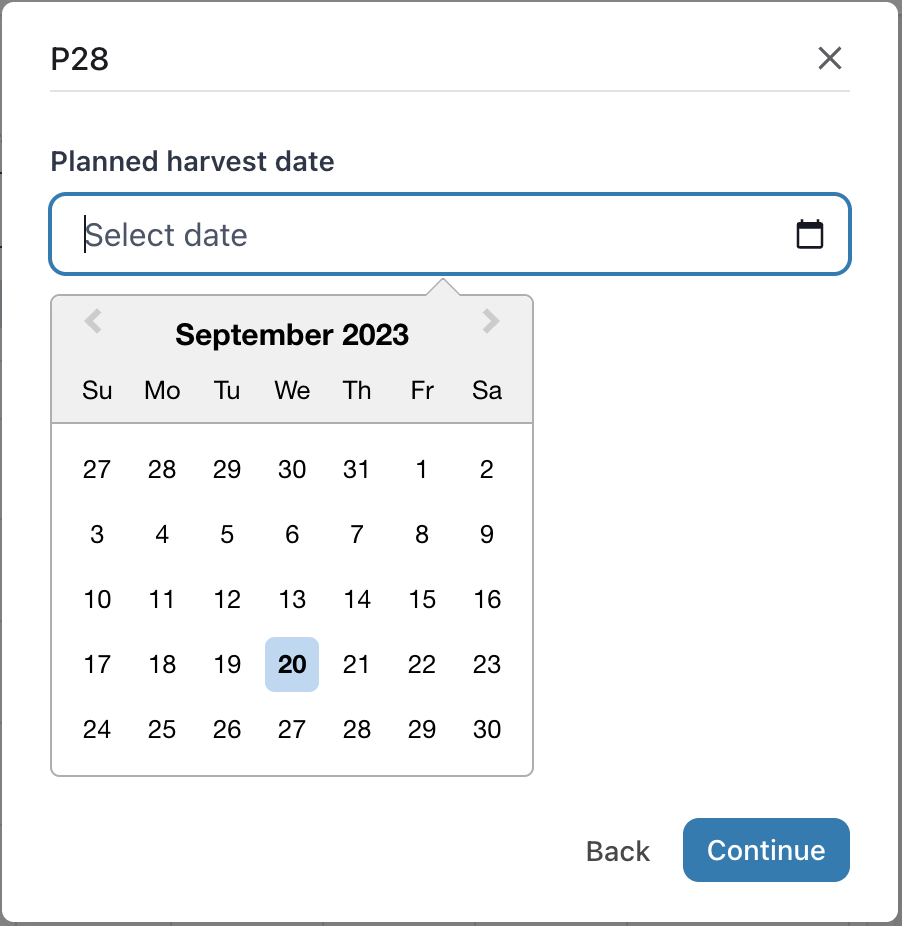
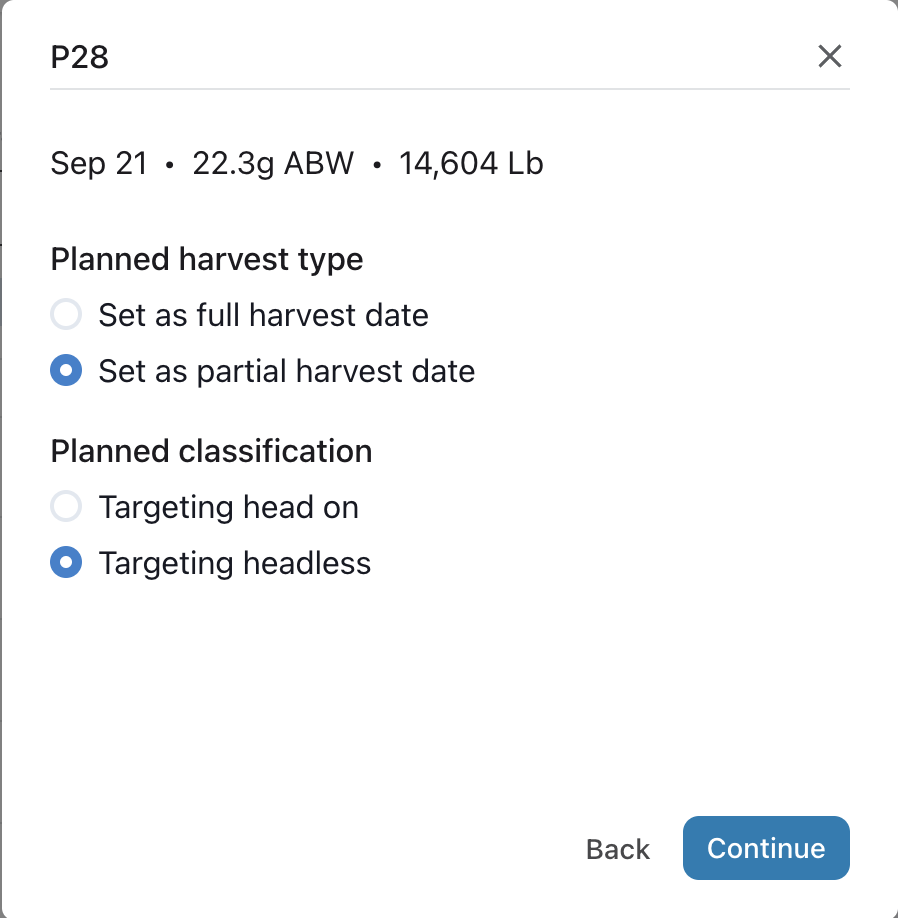
Easily set a plan for your harvest by clicking the Add button or the pencil icon in the Harvest Plan column of the pond in which you want to add a harvest. For each harvest, you can select whether you are planning a partial or full harvest, targeting head-on or headless shrimp and assign the harvest to a date.

You can also easily edit or delete the harvest plan from this page.
4. Using Your Harvest Summary

Once you’ve added the harvest plans for your farm, you can see the harvest summary in the right hand side panel.
Use this harvest summary to see exactly what you’ll be harvesting within your selected time frame and classification (Head-on or Headless). See the distribution of the biomass to be harvested summed for all your ponds, and see the breakdown of the lbs to be harvested by pond in the table underneath. Send this plan to your team to keep them up to date with upcoming harvests.
5. Examples of using the Harvest Planner to make harvest decisions
By selecting different views and target sizes, you can see the predictions of the variables that are most important to you as well as when your predictions have the highest biomass in your target class size!
Here are some sample use cases for different views:

Example 1: I am targeting the Head-On 40-50 class size for harvest in 2-3 weeks, I need to harvest at least 27,000lbs in that class size.
Since I have a specific amount of Lbs that I know I need to fill in that class size, I can change the view to Biomass lbs and change the target size to Head on: 40-50, now I see that I can meet these requirements if I harvest P1 in the week of Sep 25.
It is optimal for me to harvest between the weeks of Sept 25 and Oct 2 as I can see the lbs in Head-On 40-50 class size decreasing from the week Oct 09 onwards.
Example 2: I need to check if any of my ponds will hit carrying capacity and plan a partial harvest
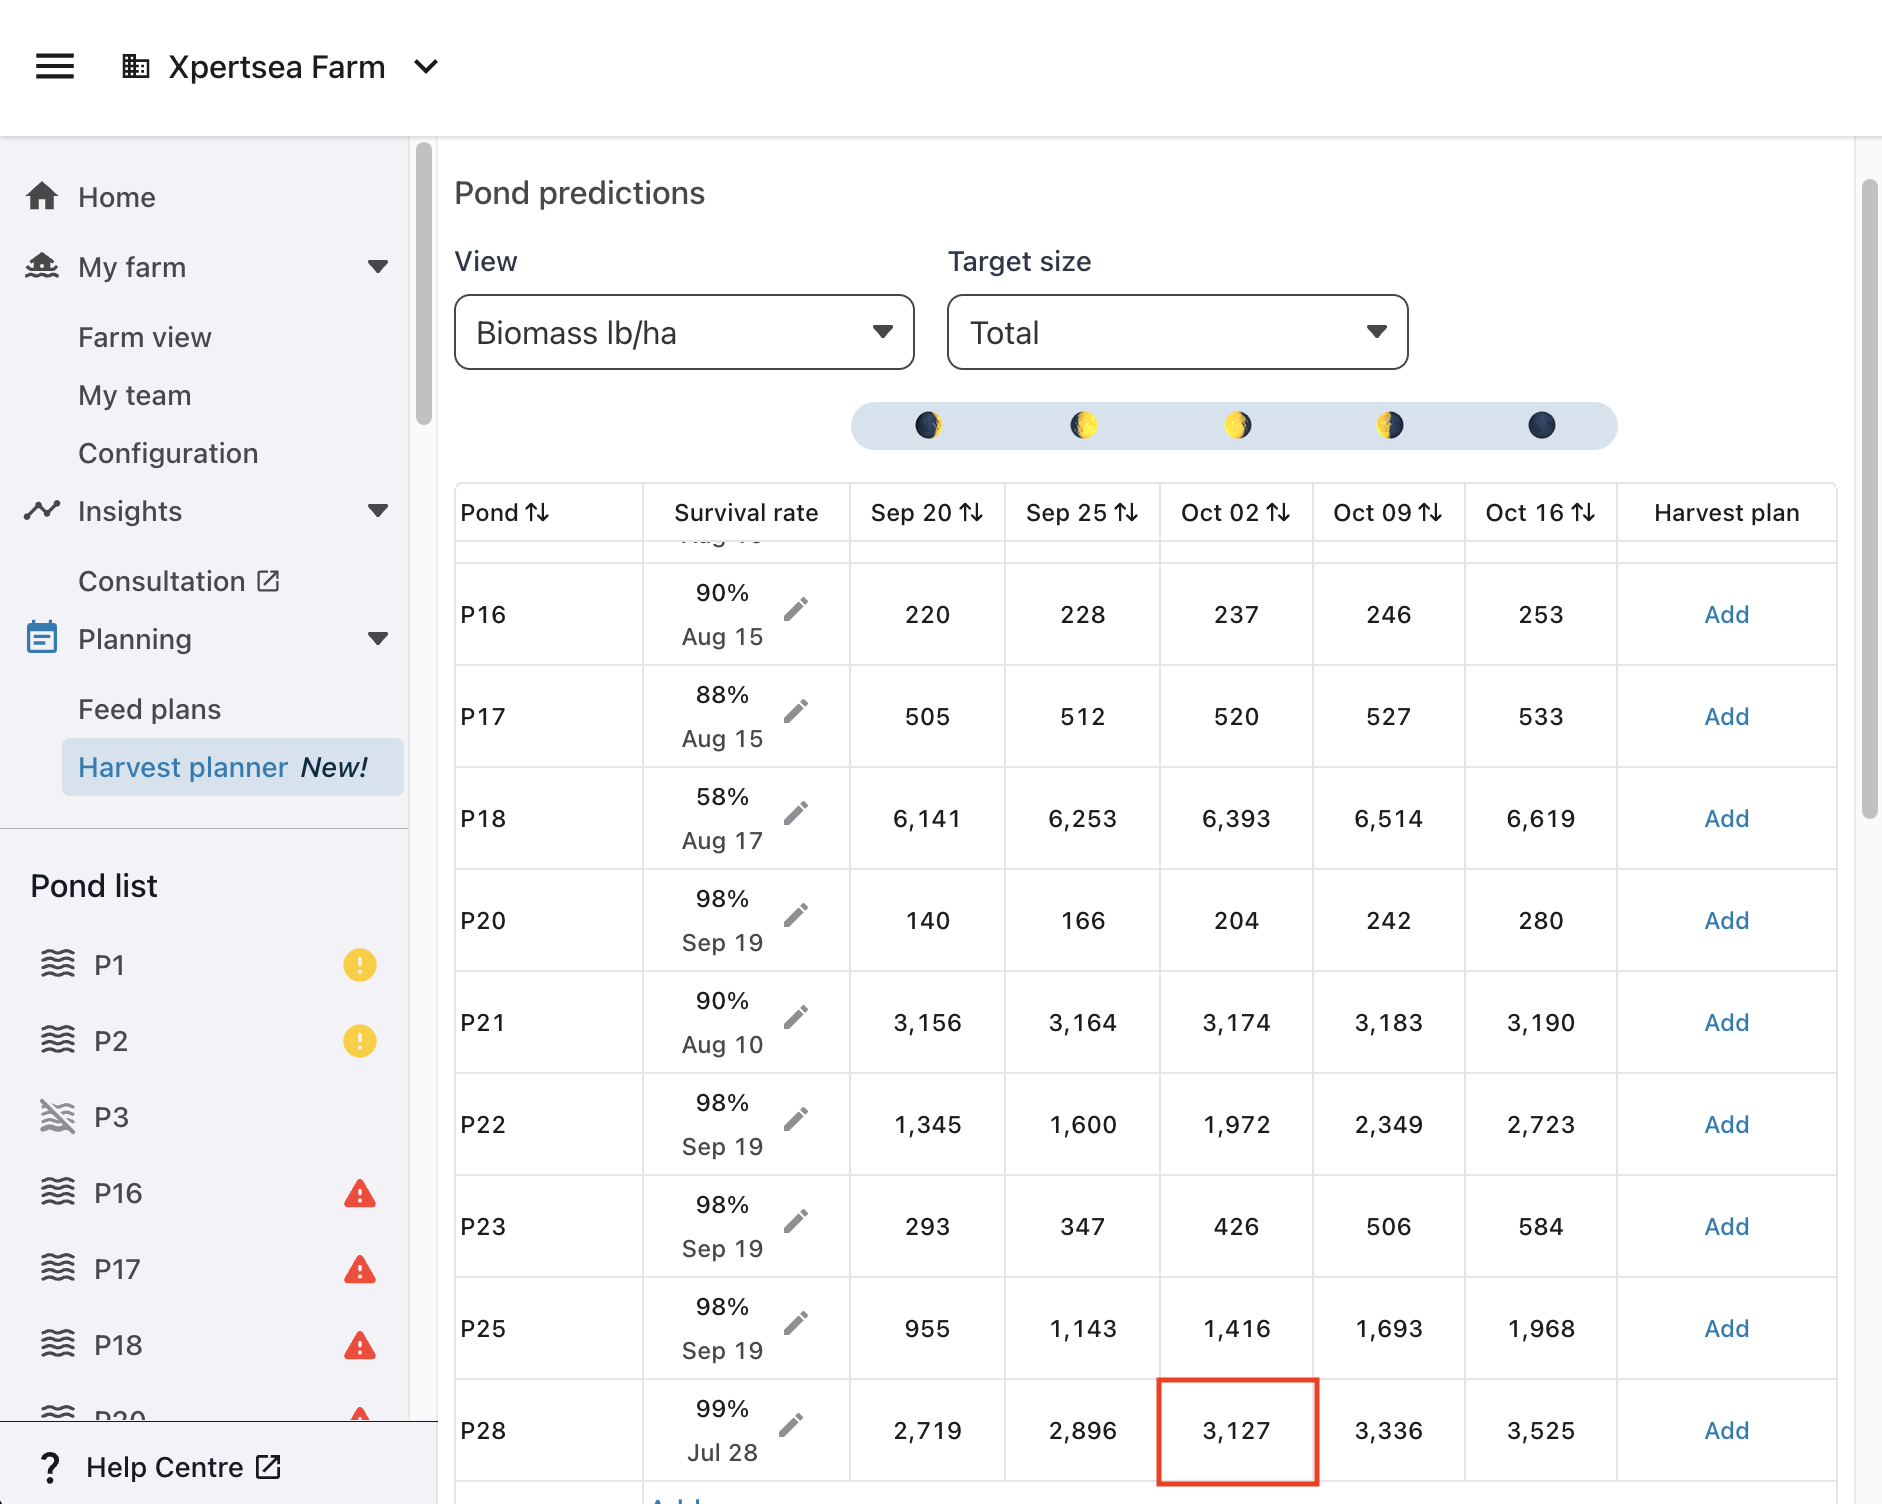
Since I know that P28 has a carrying capacity of ~3000 lb/ha, I can take a look at the Biomass lb/ha and Total view to check my projections. From the projections, I know that I will need to plan a partial harvest before Oct 2 which is when I am predicted to hit my carrying capacity.
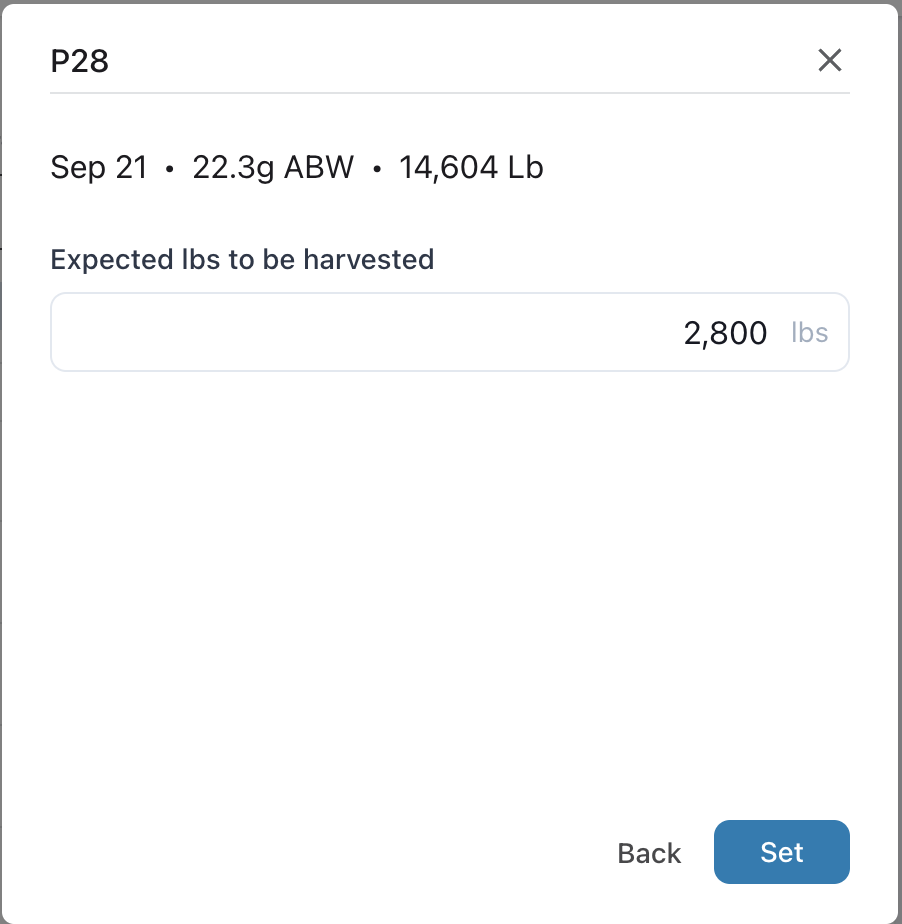
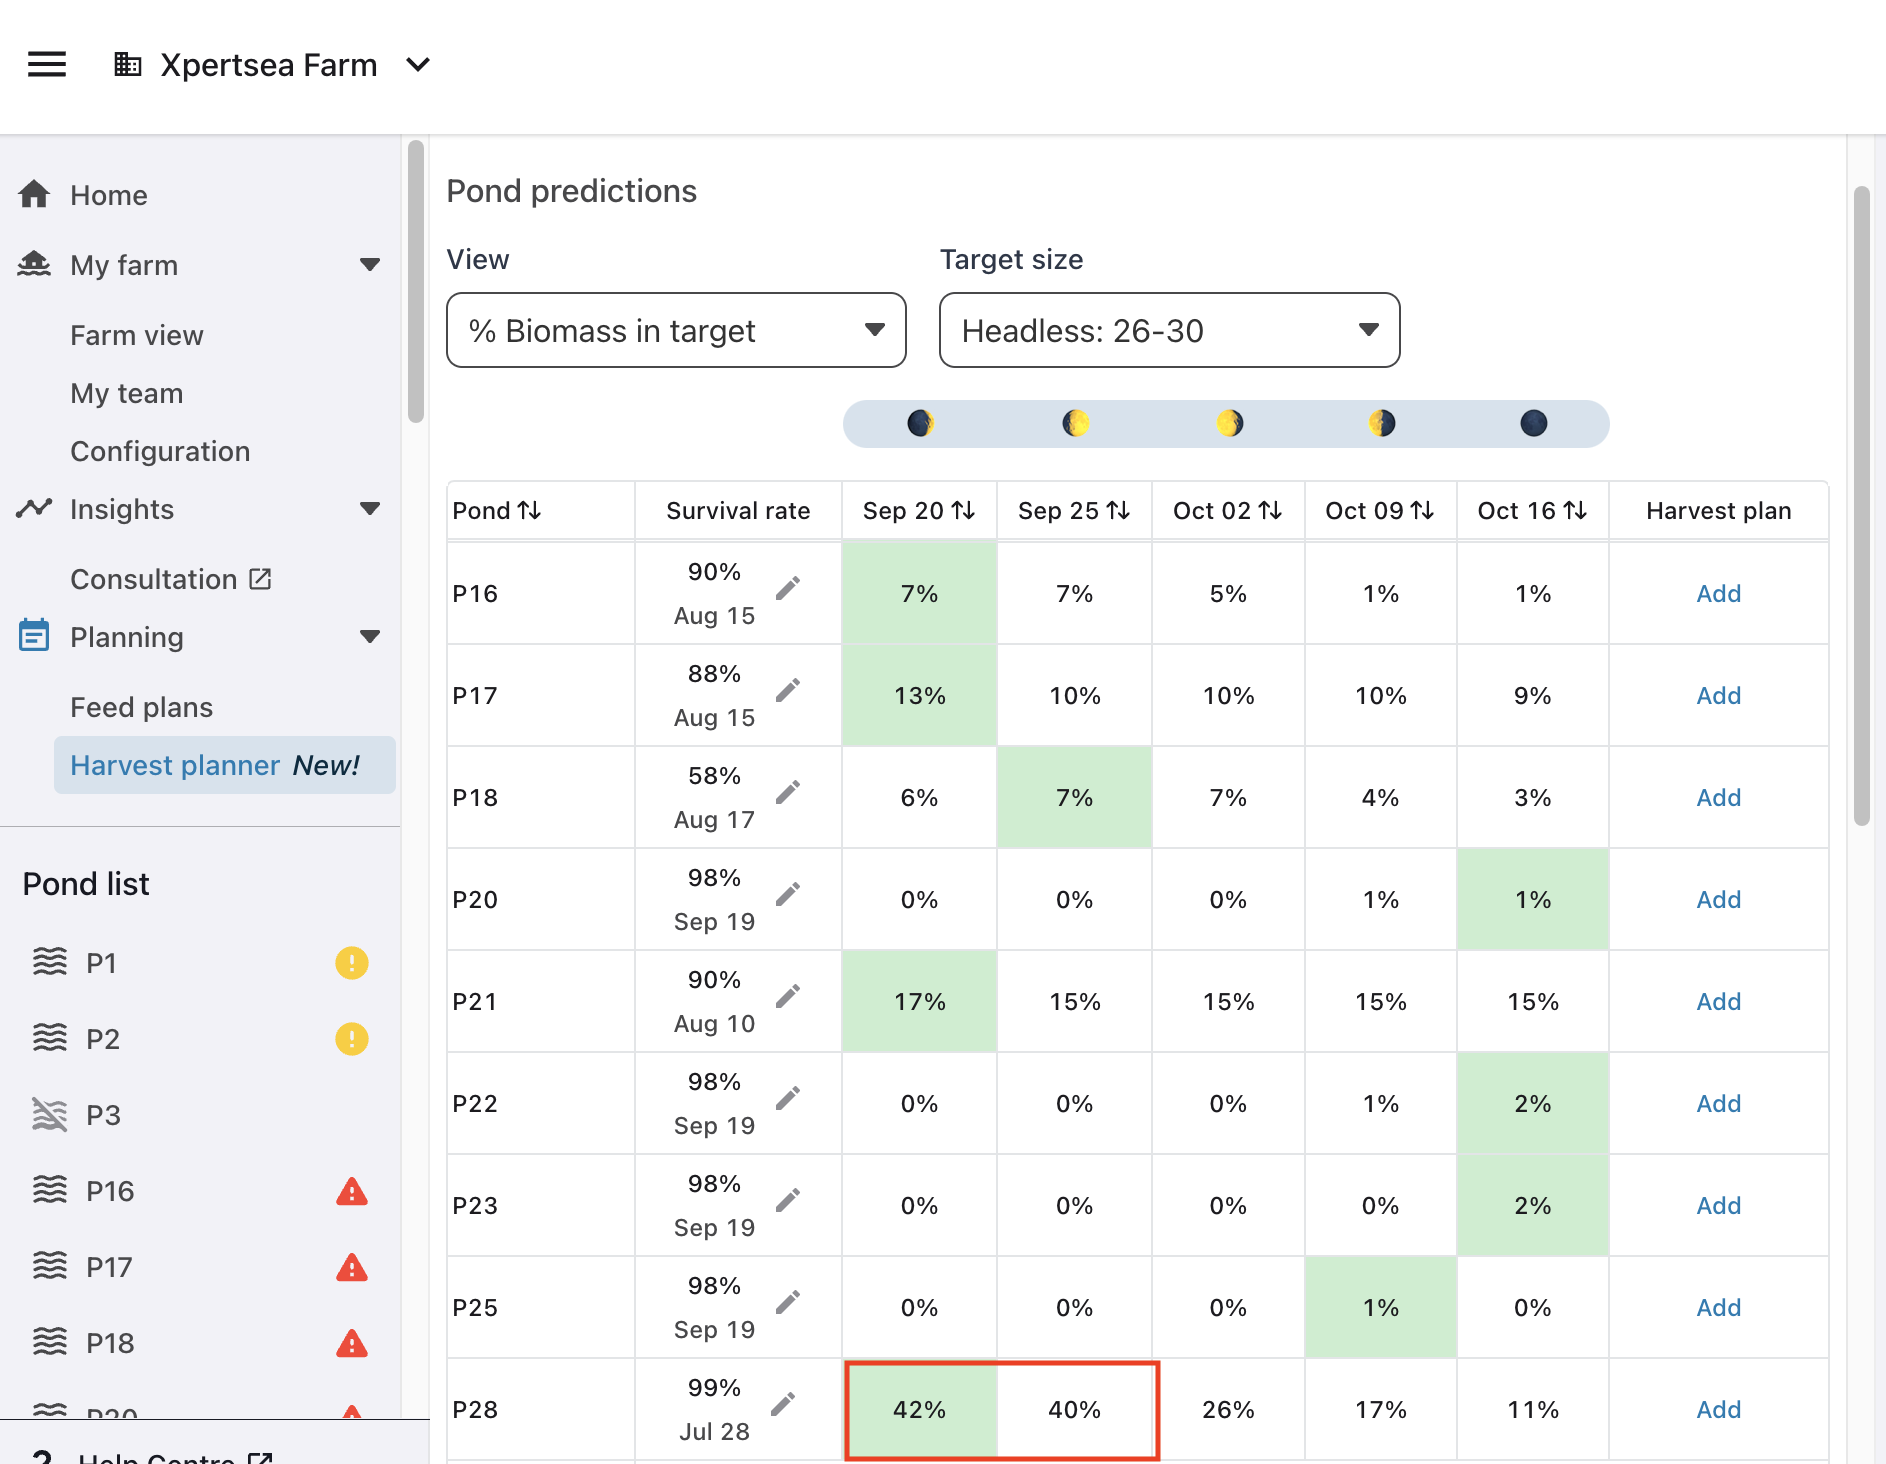
I can also change the view to see the % of biomass in target and select the Headless 26-30 size since I have good prices for that size right now and I want to make my partial harvest more profitable. It is best for me to plan my partial harvest between Sep 20 and Sep 25, as that is when I will have more % of biomass in my target size. I can then plan my partial harvest on Sep 21 and select 2800 lbs to be removed during the partial harvest.
6. Monitoring and Updates
Every time you monitor your ponds through our application, we will automatically update the predictions to take in the latest monitoring information and output updated results. We recommend that you check your harvest plan after you monitor your ponds to make sure that the previous plans you set still make sense or to make edits with the updated information!
7. Troubleshooting
Sometimes, our software may need to reload and repopulate the predictions from our model. This may take some time if your internet connection is weaker. Please be patient and if you run into any problems, please don’t hesitate to reach out to our xpertSea reps!
8. Conclusion
In this guide, we’ve covered how to get started with the Harvest Planner - an overview of the new feature, different use cases to help you take advantage of different variables and views as well as leveraging the harvest summary in the right side panel.
Don’t forget to finish setting up your farm and start using the Harvest Planner now to better understand what to expect in your ponds at harvest and plan more efficiently.
9. Additional Resources, Feedback and Questions
If you would like a walkthrough of the feature, please view the Demo Video here.
Please don’t hesitate to give us feedback on this feature or reach out with any questions or concerns! Contact your xpertSea representative to get in touch or contact us here.